Kia Soul (SK3): If you have a flat tire (with Tire Mobility Kit) / Using the TMK
1. Detach the speed restriction label (1) from the sealant bottle (2), and place it in a highly visible place inside the vehicle such as on the steering wheel to remind the driver not to drive too fast.
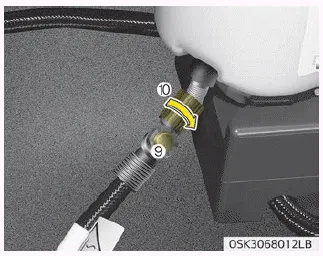
2. Screw connection hose (10) onto the connector of the sealant bottle.
3. Ensure that button (9) on the compressor is not pressed.
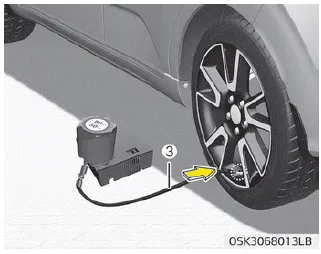
4. Unscrew the valve cap from the valve of the flat tire and screw filling hose (3) of the sealant bottle onto the valve.
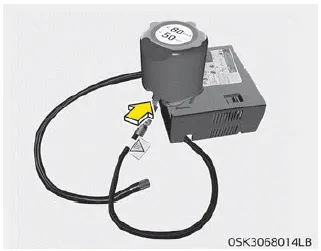
5. Insert the sealant bottle into the housing (5) of the compressor so that the bottle is upright.
6. Ensure that the compressor is switched off, position 0.
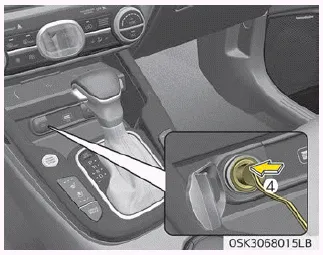
7. Connect between compressor and the vehicle power outlet using the cable and connectors (4).
8. With the engine start/stop button position on or ignition switch position on, switch on the compressor and let it run for approximately 5~7 minutes to fill the sealant up to proper pressure. (refer to the “Tire and Wheels” on page 8-48). The inflation pressure of the tire after filling is unimportant and will be checked/corrected later. Be careful not to overinflate the tire and stay away from the tire when filling it. When the tire and wheel are damaged, do not use Tire Mobility Kit for your safety.
CAUTION
Tire pressure
Do not attempt to drive your vehicle if the tire pressure is below 200 kPa (29 psi). This could result in an accident due to sudden tire failure.
9. Switch off the compressor.
10. Detach the hoses from the sealant bottle connector and from the tire valve.
Return the TMK to its storage location in the vehicle.
WARNING
Carbon monoxide
Carbon monoxide poisoning and suffocation is possible if the engine is left running in a poorly ventilated or unventilated location (such as inside a building).
1. Speed restriction label 2. Sealant bottle and label with speed restriction 3. Filling hose from sealant bottle to wheel 4. Connectors and cable for the battery direct connection 5.
11. Immediately drive approximately 7~10 km (4~6 miles or, about 10min) to evenly distribute the sealant in the tire. CAUTION Do not exceed a speed of 80 km/h (50 mph).
Other information:
Kia Soul (SK3) 2020-2025 Owners Manual: If you have a flat tire (with Tire Mobility Kit)
Please read the instructions before using the Tire Mobility Kit. 1. Sealant bottle 2. Compressor The Tire Mobility Kit is a temporary fix to the tire and we recommend that the tire inspected by an authorized Kia dealer as soon as possible. CAUTION One sealant for one tire When two or more tires are flat, do not use the tire mobility kit
Kia Soul (SK3) 2020-2025 Owners Manual: Notes on the safe use of the Tire Mobility Kit
Park your car at the side of the road so that you can work with the TMK away from moving traffic. Place your warning triangle in a prominent place to make passing vehicles aware of your location. To be sure your vehicle will not move, even when you're on fairly level ground, always set your parking brake.
Categories
- Manuals Home
- Kia Soul Owners Manual
- Battery replacement
- LCD display modes. User settings mode
- Mirrors. Outside rearview mirror. Folding the outside rearview mirror
- New on site
- Most important about car
