
Kia Soul (SK3): Light bulbs / Glove box lamp replacement
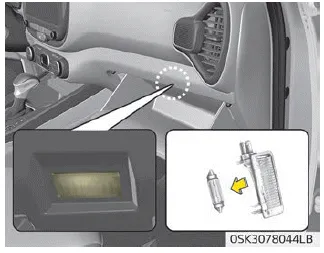
1. Using a flat-blade screwdriver, gently pry the lamp assembly from interior.
2. Remove the bulb by pulling it straight out.
3. Install a new bulb in the socket.
4. Install the lamp assembly to interior.
CAUTION
Be careful not to dirty or damage the lens, lens tab, and plastic housings.
WARNING Prior to working on the Interior lamps, ensure that the “OFF” button is depressed to avoid burning your fingers or receiving an electric shock.
1. Using a flat-blade screwdriver, gently pry the lens cover from lamp housing. 2. Remove the bulb by pulling it straight out. 3. Install a new bulb in the socket.
Other information:
Kia Soul (SK3) 2020-2025 Owners Manual: Battery
For best battery service Keep the battery securely mounted. Keep the battery top clean and dry. Keep the terminals and connections clean, tight, and coated with petroleum jelly or terminal grease. Rinse any spilled electrolyte from the battery immediately with a solution of water and baking soda.
Kia Soul (SK3) 2020-2025 Owners Manual: Battery capacity label (see the example)
❈ The actual battery label in the vehicle may differ from the illustration. 1. CMF60L-BCI: The Kia model name of battery 2. 12V: The nominal voltage 3. 60Ah(20HR): The nominal capacity (in Ampere hours) 4. 92RC: The nominal reserve capacity (in min.
Categories
- Manuals Home
- Kia Soul Owners Manual
- LCD display modes. User settings mode
- System setting and activation
- Check tire pressure
- New on site
- Most important about car
