Kia Soul (SK3): Maintenance / Air cleaner
Filter replacement
It must be replaced when necessary, and should not be washed.
You can clean the filter when inspecting the air cleaner element.
Clean the filter by using compressed air.
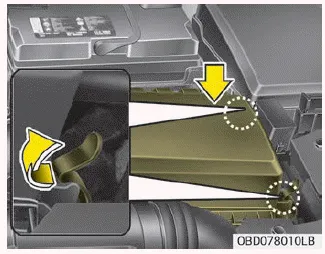
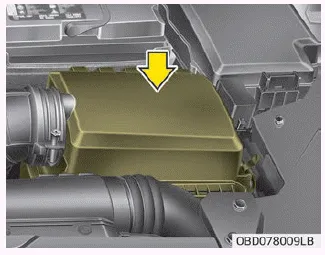
1. Loosen the air cleaner cover attaching clips and open the cover.
2. Wipe the inside of the air cleaner.
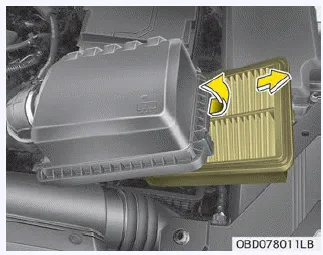
3. Replace the air cleaner filter.
4. Lock the cover with the cover attaching clips.
Replace the filter according to the Maintenance Schedule.
If the vehicle is operated in extremely dusty or sandy areas, replace the element more often than the usual recommended intervals. (Refer to “Maintenance under severe usage conditions” on page 8-16.)
CAUTION
- Do not drive with the air cleaner removed; this will result in excessive engine wear.
- When removing the air cleaner filter, be careful that dust or dirt does not enter the air intake, or damage may result.
- Use parts for replacement from a professional workshop. Kia recommends to visit an authorized Kia dealer/service partner.
Checking the parking brake Check the stroke of the parking brake by counting the number of “clicks’’ heard while fully applying it from the released position.
Filter inspection If the vehicle is operated in the severely air-polluted cities or on dusty rough roads for a long period, it should be inspected more frequently and replaced earlier.
Other information:
Kia Soul (SK3) 2020-2025 Owners Manual: Recommended cold tire inflation pressures
All tire pressures (including the spare) should be checked when the tires are cold. “Cold Tires” means the vehicle has not been driven for at least three hours or driven less than 1.6 km (1 mile). Recommended pressures must be maintained for the best ride, top vehicle handling, and minimum tire wear.
Kia Soul (SK3) 2020-2025 Owners Manual: Map lamp (Bulb type) bulb replacement
WARNING Prior to working on the Interior lamps, ensure that the “OFF” button is depressed to avoid burning your fingers or receiving an electric shock. 1. Using a flat-blade screwdriver, gently pry the lens cover from lamp housing. 2. Remove the bulb by pulling it straight out.
Categories
- Manuals Home
- Kia Soul Owners Manual
- LCD display modes. User settings mode
- Immobilizer system
- System setting and activation
- New on site
- Most important about car
